
Building raised beds is easier than blogging!
- Stephanie

- Aug 28, 2018
- 3 min read
Never in my life have I pictured myself being a blogger. I am good at a lot of things, but blogging is not my forte. Finding the perfect platform, doing the design work, knowing what to say... nope. Doesn't come easy.
What does come pretty easy? Growing things. I love my garden. I have had a garden every year for the past 8 or so years. Every year, I like to try new things. We have grown tomatoes, zucchinis, green beans, butternut squash, bell peppers and much more. Last year, I worked with the middle school I coach at to write and win a grant to build raised beds for the school.
The building process was relatively easy. My soon-to-be father-in-law taught me how to build the beds for the school. This was such a rewarding experience. So, we built our own in the back yard! I have had a few people ask about building raised beds. Today, I share with you the process we took for my personal raised garden bed.
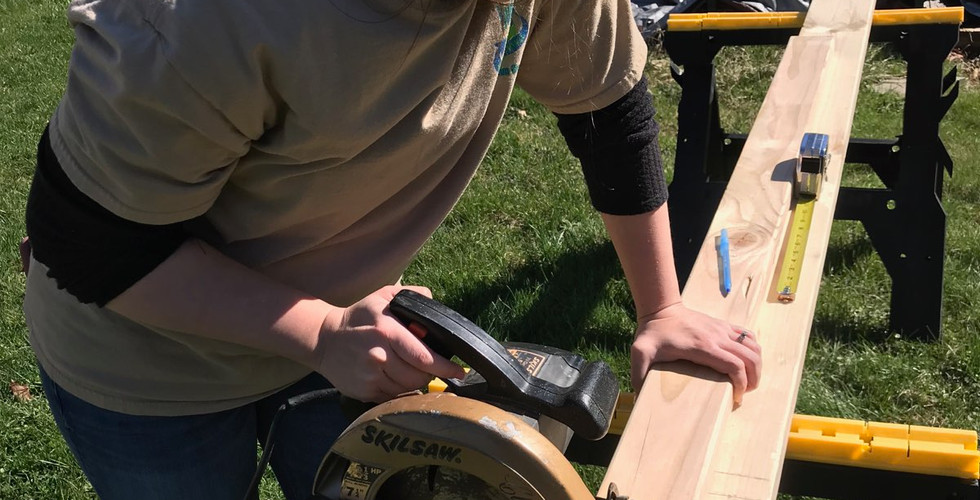
Raised beds Materials:
2x8x8 (4) (untreated) boards
4x4x8 (untreated) boards
3 inch star bit screws
Circular saw
Carpenters square or speed square
Screw gun/drill
Weed preen fabric or plastic (3’x6’)
12 bags of organic soil
Mark one of the 2x8’s with a pencil at 5 foot and square the line utilizing the carpenter square or speed square.
Utilize the circular saw to cut the 2x8
Repeat step one and two for the other 3 boards
You should now have 4, five foot sections and 4 sections that are a little less than 3 foot.
Utilize the circular saw to cut the 4x4’s In to 1 ¾ sections, there should be 4 of them
Take one of your 5 foot 2x8 sections and one of your shorter 2x8 sections and align them at a 90 degree angle.
Place one of the 4x4 sections in the inner corner, aligning the bottom of the 4x4 with the bottom of the 2x8 (so that they sit flat on the ground). Take one of the 3 inch screws and screw the 2x8’s into the 4x4. Repeat for the other board.
Move to the opposite end of the 2x8 and place another short section of 2x8 in a 90 degree angle. Again, place the 4x4 inside the corner, flush with the ground and screw in the 2x8 to the 4x4
Repeat step 7 and 8 for the opposite side. You should now have the bottom level of 2x8’s secured to the 4x4’s completing the bottom level of the raised bed.
Continue to screw in 2x8 sections to the 4x4’s. (note there will be some space left over at the top of the 4x4’s. They should not be flush with the top of the 2x8’s.
You now have a large raised bed.
Place the weed preen fabric down where you would like your raised bed to be. Pick up the raised bed and move it directly on top of your weed preen fabric. (I used plastic as my area has persistent weed species that will get through the weed preen fabric.)
Fill the raised bed with bags of soil by pouring a bag out going from one end to the other, leveling the soil out as you go. The soil should come up to within an inch of the top of the raised bed. Remember there will be some settling of the soil.
CONGRATS! You have now made a raised bed garden. ENJOY!


Comments